Week 28 : 2/27/2023 - 3/6/2023
- Ian Matheson

- Mar 6, 2023
- 3 min read
Objectives
This week, Ian resoldered the IR sensor on Window 1 and the PWM controller load wires. In the main MCU code, Ian programmed hysteresis into the cooling mode function, wrote a function to read the onboard temperature of the Raspberry Pi Pico, and programmed functions to write all sensor data, battery voltage, battery modes, and cooling modes to a .txt file.
Resoldering
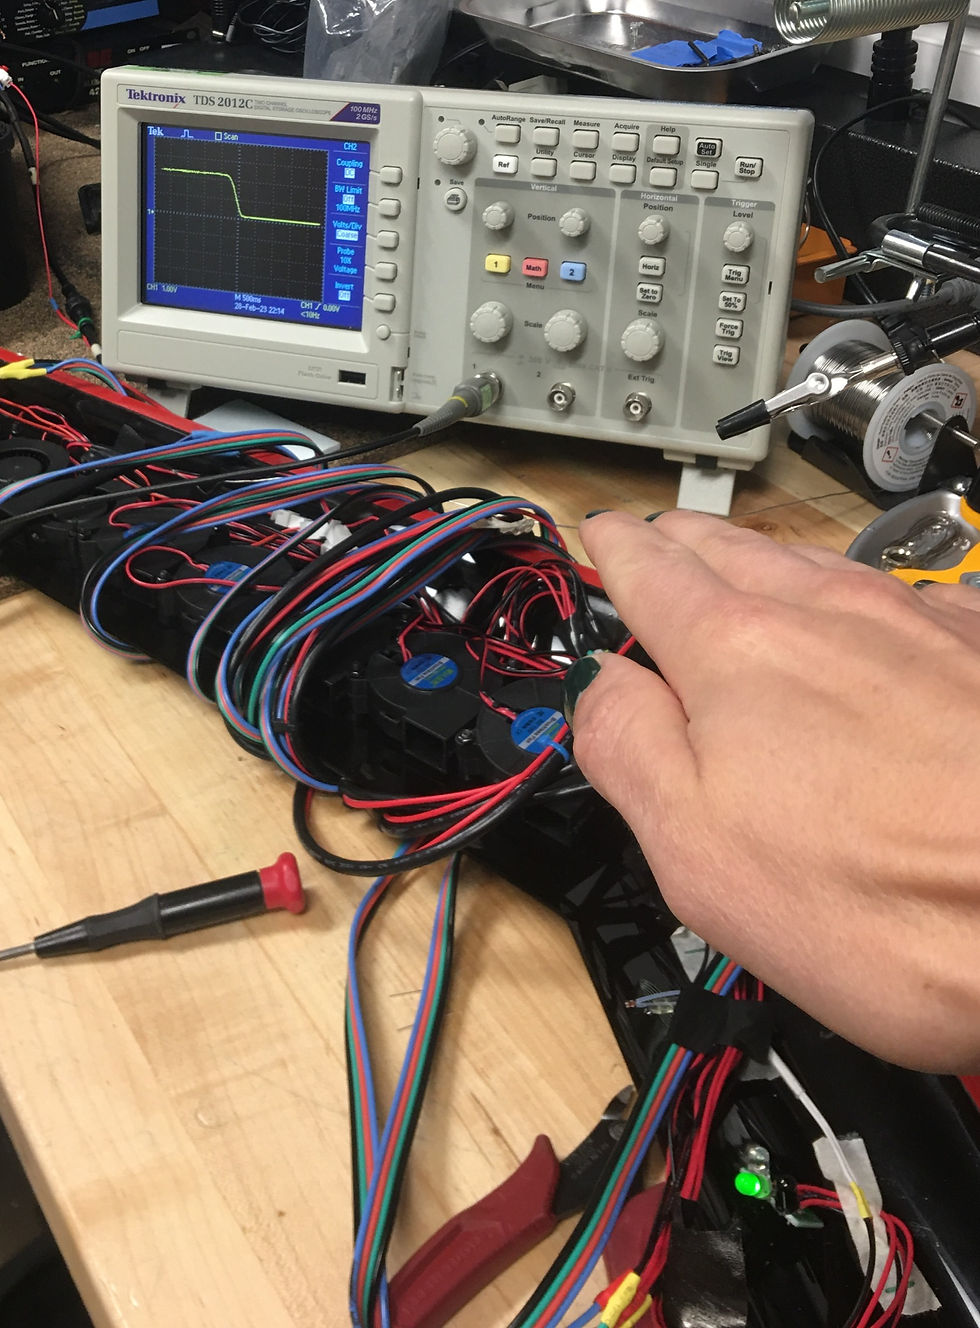
The group determined that the IR emitter on Window 1 was wired backward during testing on Monday. This means the previous flipping of the emitter was a mistake. To fix this, Ian desoldered the IR emitter and resoldered it in reverse such that it was wired in the same direction as before. He tested the IR sensor by running it with the main code and connecting an oscilloscope to read the voltage at the photodiode cathode.
In the image below, Ian had just moved his hand to obstruct the IR sensor. There was an immediate voltage drop at the photodiode cathode. This verifies that the sensor is operating properly.

Another quick fix, Ian connected longer wires from the PWM controller load output to the buck/boost converter. This makes it much easier to get the system started.

Cooling Mode Hysteresis
The flowchart below shows how the hysteresis is implemented. Two global variables hold the previous mode and previous temperature standard deviation. At the start of the function, the new temperature standard deviation is taken. If the difference between them is greater than 3, then a cooling mode will be selected. The previous mode will then be set to the selected mode, and the previous temperature deviation will be set to the new temperature deviation. If the condition is not satisfied, then the mode returned by the function will be set equivalent to the previous mode.

The printout below shows the hysteresis in action. With no temperature sensors plugged in, the T values vary wildly. The cooling mode is only selected when the difference between new_t and prev_t is greater than 3. This is observed from the first to the second iteration and from the third to the fourth iteration.

Reading the Onboard Temperature Sensor
To read the temperature in Fahrenheit from the Raspberry Pi Pico onboard sensor, the following two lines of code are used. The sensor is reasonably accurate and matched the room temperature closely.

Writing Data to a .txt File
Writing data to files using CircuitPython is tricky. CircuitPython cannot normally write data to files from within the program; the tradeoff is that the programmer has read and write access to the whole file structure on the board. Luckily, there is a simple workaround.
First, a file named boot.py is created in the main directory. This file is the first thing that executes when the Pico gets power. The following code is written in boot.py. This allows the Pico to write.

The tricky part about this is that once the Pico has write access, the user can no longer write files, so no changes can be made to the code in this mode. To make changes, the user can use the CircuitPython terminal to execute the following code, which changes the name of boot.py so that it doesn't run on startup. To switch the mode back again, the user can simply change the name back to boot.py from the file explorer.

Another tricky thing about this method is that once the Pico has write access, the user has no way to know whether the code is executing properly. To do that, a try/except method is used in the main loop to change the blink speed of the onboard LED according to the error status.

With the above functionality in place, writing data to a txt file is simple. The following code opens the datalog file in append mode and places the headers in the first line. The get_time function is called as the first argument in every iteration of the datalog.write code to get the time from Pico startup. Unfortunately, the Pico does not have a real-time clock, so the start time must be noted manually anytime we run tests.

Running the Pico standalone in write mode, the following .txt file is generated. This is easily converted to spreadsheet format by importing the .txt file in Excel and using commas as the column delimiter.

Completion of 3D Printed Nozzles
Ian's 3D printing accomplice, Duncan, finished the nozzles on Wednesday. Ian picked them up and delivered them to Daniel along with the Window 1 vent visor and control module for weekend testing.
Summary
After fixing the IR sensor for Window 1 and extending the PWM controller wires, Ian improved the fan control code by adding hysteresis to the cooling mode selection program. This prevents the fans from switching back and forth when the temperatures between windows are teetering on a switching threshold. Next, Ian added a function that reads the onboard temperature of the Raspberry Pi Pico. Finally, Ian added a function that writes all the sensor data, battery voltage, battery mode, and cooling mode to a .txt file.

Comments